How to Repair the Driver's Door Lock and Light Bulb
Stephen Stanley
I started a discussion a week or two back about fixing the small,
white plastic illuminator which lights the keyhole when you lift the door handle on a 3rd
gen. The consensus was that to replace it, you have to buy a new lock cylinder (at around
$50) and get it re-keyed to match the other locks. Well, I can update you on this and
maybe save you some money. If the white plastic flap is broken, then to fix this, you CAN
take the lock cylinder apart and replace it without buying a new cylinder (see
instructions part 2 below). If it is the bulb which has stopped working, then you do not
have to replace the cylinder. In fact doing so is no help at all. The bulb under
discussion is the one which illuminates the door lock which comes on at the same time as
the orange lamp which lights the ignition lock. It is triggered when you lift the door
handle.

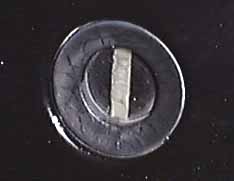
The infamous illuminated door lock
To replace the illuminator bulb
Remove the door handle by pulling the triangular panel off the
inside of the door and unscrewing the two bolts that hold the lock mechanism in place.
There are two wire coat hanger-like wires which are removed by twisting the plastic
devices they fit into. The wires then simply pull out of the lock assembly.The bulb is
held in place by the same clip which holds in the door lock cylinder. The bulb is a small
incandescent one with fly-leads which are very fragile. These wires break off where they
enter the glass of the bulb. You can replace the bulb (it comes attached to an 18-inch
wiring harness) without having to buy a new lock. To replace the bulb and harness, you
will need to remove the driver's door interior panel. (Two screws at the front, one at the
rear and one under a flap behind the interior door release). Having removed the screws,
gently pop the panel off the door and carefully lift it off where it locates into the top
of the door. The two grommets which the panel locates in on the top of the door are very
delicate and my local Mazduh dealer can't find them in their parts catalog, so be careful.
There are three white plastic electrical connectors towards the rear of the door, near its
top edge. The one nearest the front of the car is the one that this bulb connects to. The
harness is also held in place by a clip which is fitted from inside the door itself, so
you will have to pull the plastic sheeting off the inside of the door to get access to
this. I don't know how much Mazda charge for the bulb and harness, but it is possible just
to solder a new bulb on the end of the harness. If you do - make sure you either a)
disconnect the plug inside the driver's door panel b) disconnect the battery or c) put the
key in the ignition and turn it to the ACC position (check the ignition switch lamp is off
before soldering) I used a similarly sized bulb from an illuminated switch I had lying
around my garage at home. It's not quite as bright as the original, but does the job.
To replace the plastic flap
This takes care. Make sure you are working somewhere clean and will
contain the bits that may fly out when you start disassembling the lock. You need to
remove the polished cover which is on the front of the cylinder. By feeding a very small
jeweler screwdriver under the rim, you can ease up the two detents which hold it on. Take
the cover off, followed by the black plate with the rectangle through which the key is
inserted to unlock the door. When you remove this, the flap can then be accessed. There is
a spring under the flap (by now it has probably just flown over your left shoulder). Mazda
do not supply this flap without a lock, but I used the translucent lid from a fabric
conditioner bottle and cut one to size, using a small hacksaw and a file. I did this last
June and it is still going strong. As they say, reassembly is the reverse of the above
procedure. The flap-spring goes back into the lock with the short arm to locate it and the
long arm against the underside of the flap.Have fun!
Stephen Stanley
|