Antiroll Bar Bushing Upgrade
By Rob Robinette
I was pretty happy with the stock antiroll bars on my 93 but this year is known for being a little lose (tail happy or over-steer prone) due to a larger rear antiroll bar than the 94 and 95 cars. By firming up the front antiroll bar mount and bushings you can make the car's handling a little more balanced. For more information on antiroll bars click here. I'm very happy with this mod, I front end actually feels tighter and so far there is no additional noise or harshness.
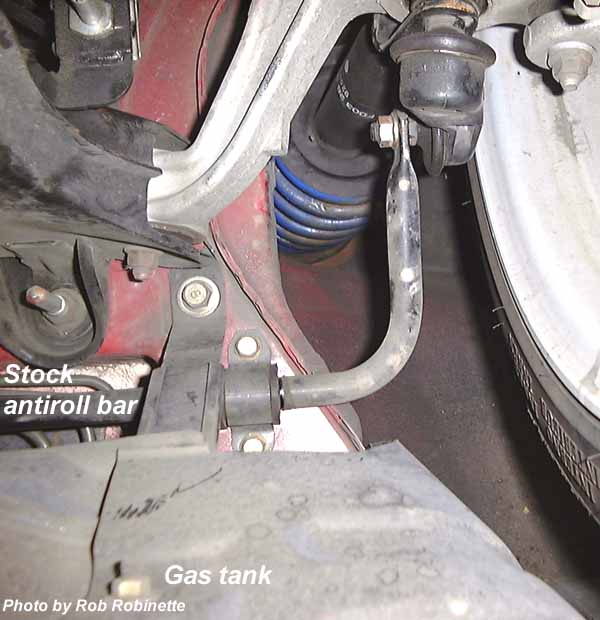
Stock front antiroll bar with rubber bushing removed, position clamp metal band removed, and Racing Beat antiroll bar mount reinforcer (looking from rear to front)
I added a Racing Beat antiroll bar mount reinforcer and Energy Suspension antiroll bar bushings to the front suspension (see photos below). I looked into adding new bushings to the rear antiroll bar, but the Energy Suspension bushing mounting plates are much too large to fit the stock rear bar mount location (plus that would have negated the improvement in handling balance).
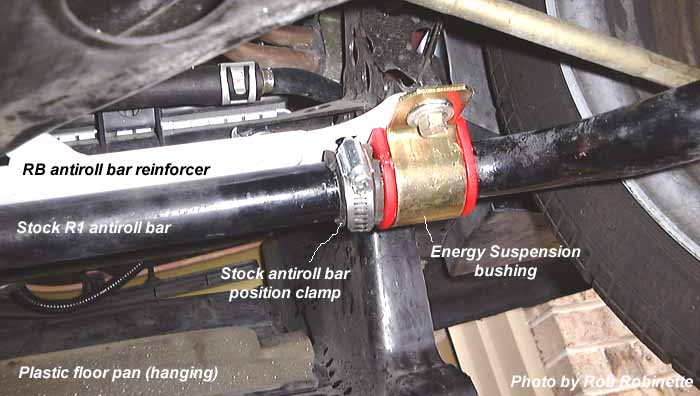
The completed installation
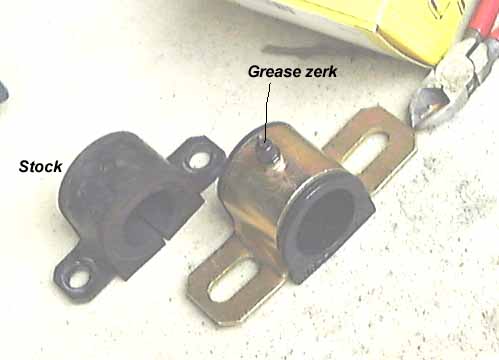
The 93 RX-7 has a 1.13 inch front (not 1.3 inches as reported by someone else) and 0.68 inch rear antiroll bars. The Energy Suspension 1 1/8 inch antiroll bar bushings fit perfectly on the front. I got the bushings from http://www.summitracing.com part # ENS-9-5112 for $15, or you can get the grease zerk fitted bushings in the same size for the same price. I didn't go with the zerk fitted bushings because they stick straight down. You'd have to drill a hole in the floor pan and the zerk fittings would probably get ground off on the first big bump you hit.
I had to use different washers to fit the stock 12mm bushing bolts. The washers supplied by Energy Suspension were too large (made for larger bolts).
Start by dropping the black plastic engine floor pan. You'll need to remove the two bolts on the rear edge, the two plastic plugs at the rear corners, and two bolts on each side of the pan.
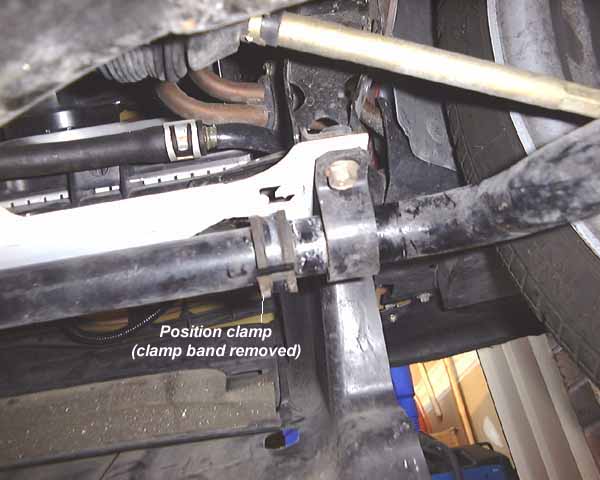
Remove the 4 bushing mount bolts and remove the stock bushings. The stock antiroll bar has two position clamps installed just inside the bushings to keep the bar from sliding laterally. You'll have to move their position slightly inboard to make room for the wider bushings. Use dykes to cut the bands securing the position clamps (see photo above) and carefully pull them off the antiroll bar.
Be sure to clean the bar around the bushings and use the supplied grease on the bar and inside (not outside) of the bushing. Don't grease the bar where the stock position clamps will mount because they need to be re-glued to the antiroll bar.
The new bushings are a nice tight fit. To get the stock bolts through the bushing mount and RB reinforcer I had to get one bolt started then use a clamp on the other end of the bushing mount to close the gap so I could get the other bolt started.
I re-glued the rubber position clamp in place with contact cement, then added a hose clamp to replace the stock metal bands that held it in place (see photo above). Try to keep the antiroll bar end-links as vertical as possible (the mounts can be slid foreword and aft to adjust this). If the end-links are not vertical they will stress the bar mounts horizontally and could cause them to crack and fail.
Stock and Energy Suspension bushing comparison